At a Glance
- A planned step-wise point cloud to BIM model conversion process across pre and post conversion stages helps address process complexities and ensures higher model accuracy.
- The first step includes preparing the scanned data for insertion into Revit or other modeling software.
- The second step involves importing the data into Revit software to create a final 3D BIM model.
- A final quality check or validation process ensures data integrity and conformity to LOA and LOD.
Introduction
Point Cloud to Revit models capture intricate geometrical data of the as-built conditions of existing structures. The built-in BIM intelligence in Revit elements gives engineers and architects a holistic visualization of the As-Built environment, invaluable for renovations, retrofitting, and facilities management.
An inaccurate BIM model often leads to poor visualization, interoperability issues, data loss, greater rework, and other issues. A structured step-by-step process ensures better monitoring and planning to help create effective scan to BIM models which accurately represent existing building conditions. Regular monitoring at every stage also enables you to catch and rectify issues early in the process, leading to a smoother workflow and higher-quality outcomes.
In this article, we will explore this stepwise approach used in point cloud conversion to generate accurate, efficient, and usable 3D models.
Stage 1: Point Cloud Data Preparation
During point cloud data preparation, you acquire data, then register and align it to ensure spatial coordination within the BIM model. Finally, clean the data to remove noise, artifacts, and inconsistencies.
Data Acquisition
Accurate modeling starts with high-quality point cloud data acquisition. Using advanced technologies such as laser scanning or photogrammetry ensures precise capture of the store’s geometry, dimensions, and architectural details.
Data Registry
Aligning and registering multiple scans from different positions is essential to create a unified point cloud that accurately represents the entire project space.
Registering multiple row scans in .rcp file
Register point cloud .rcp file
Data Cleaning
Removing unwanted noise, outliers, and irrelevant data points from the point cloud enhances accuracy and prevents errors in the subsequent modeling process.
Stage 2: Point Cloud to Revit Model Conversion
In this stage, you import the cleaned point cloud data into Revit, and establish reference planes and origin coordinates to maintain spatial accuracy. Then, accurately place model components, such as walls, floors, and MEP elements, based on the point cloud data.
Import Point Cloud Data into Revit
Once the point cloud data is refined, it is imported into Revit using dedicated point cloud software or direct import functionality using “insert point cloud”. Revit supports various file formats, including RCP, .RCS, .E57, or .XYZ.
Establishing Reference Planes and Origins (Coordinates)
To ensure accurate 3D modeling, reference plans and coordinates of the scan data need to be placed correctly by using shared coordinates in Revit. These reference elements serve as the foundation for placing the model components based on the point cloud data.
Placing Model Components
Using the point cloud as a reference, designers start placing model components in Revit. Basic elements such as walls, floors, ceilings, columns, and doors are positioned according to the point cloud data.
Common mistakes observed while placing model components include:
· Incorrect Point Cloud Registration and insufficient data cleanup
· Large file size of the scanned data
· Generic or in-place modeling of the repetitive elements
· Failing to incorporate 360-degree views or recap side by side during modeling
· Absence of comprehensive quality assurance checks
Tips to navigate these mistakes and achieve accuracy of the 3D Point Cloud to BIM model include:
· All the elements should be modeled based on the modeling categories
· For modeling based on Scan data, use multiple views to model elements.
For example. When modeling a wall using floor plans, check 3D views of the modeled element simultaneously to achieve high quality
· Use constructive methods as a modeling practice
· Additionally, the use of a plugin like Undet for Revit facilitates the handling of massive point cloud datasets by efficiently working with raster images. This results in faster and more accurate modeling processes
· Based on the scan, deviation needs to be recorded as per elements (if any)
· Avoid use of generic models and models in place element within the model
· Use Recap to review the scan data during the modeling process
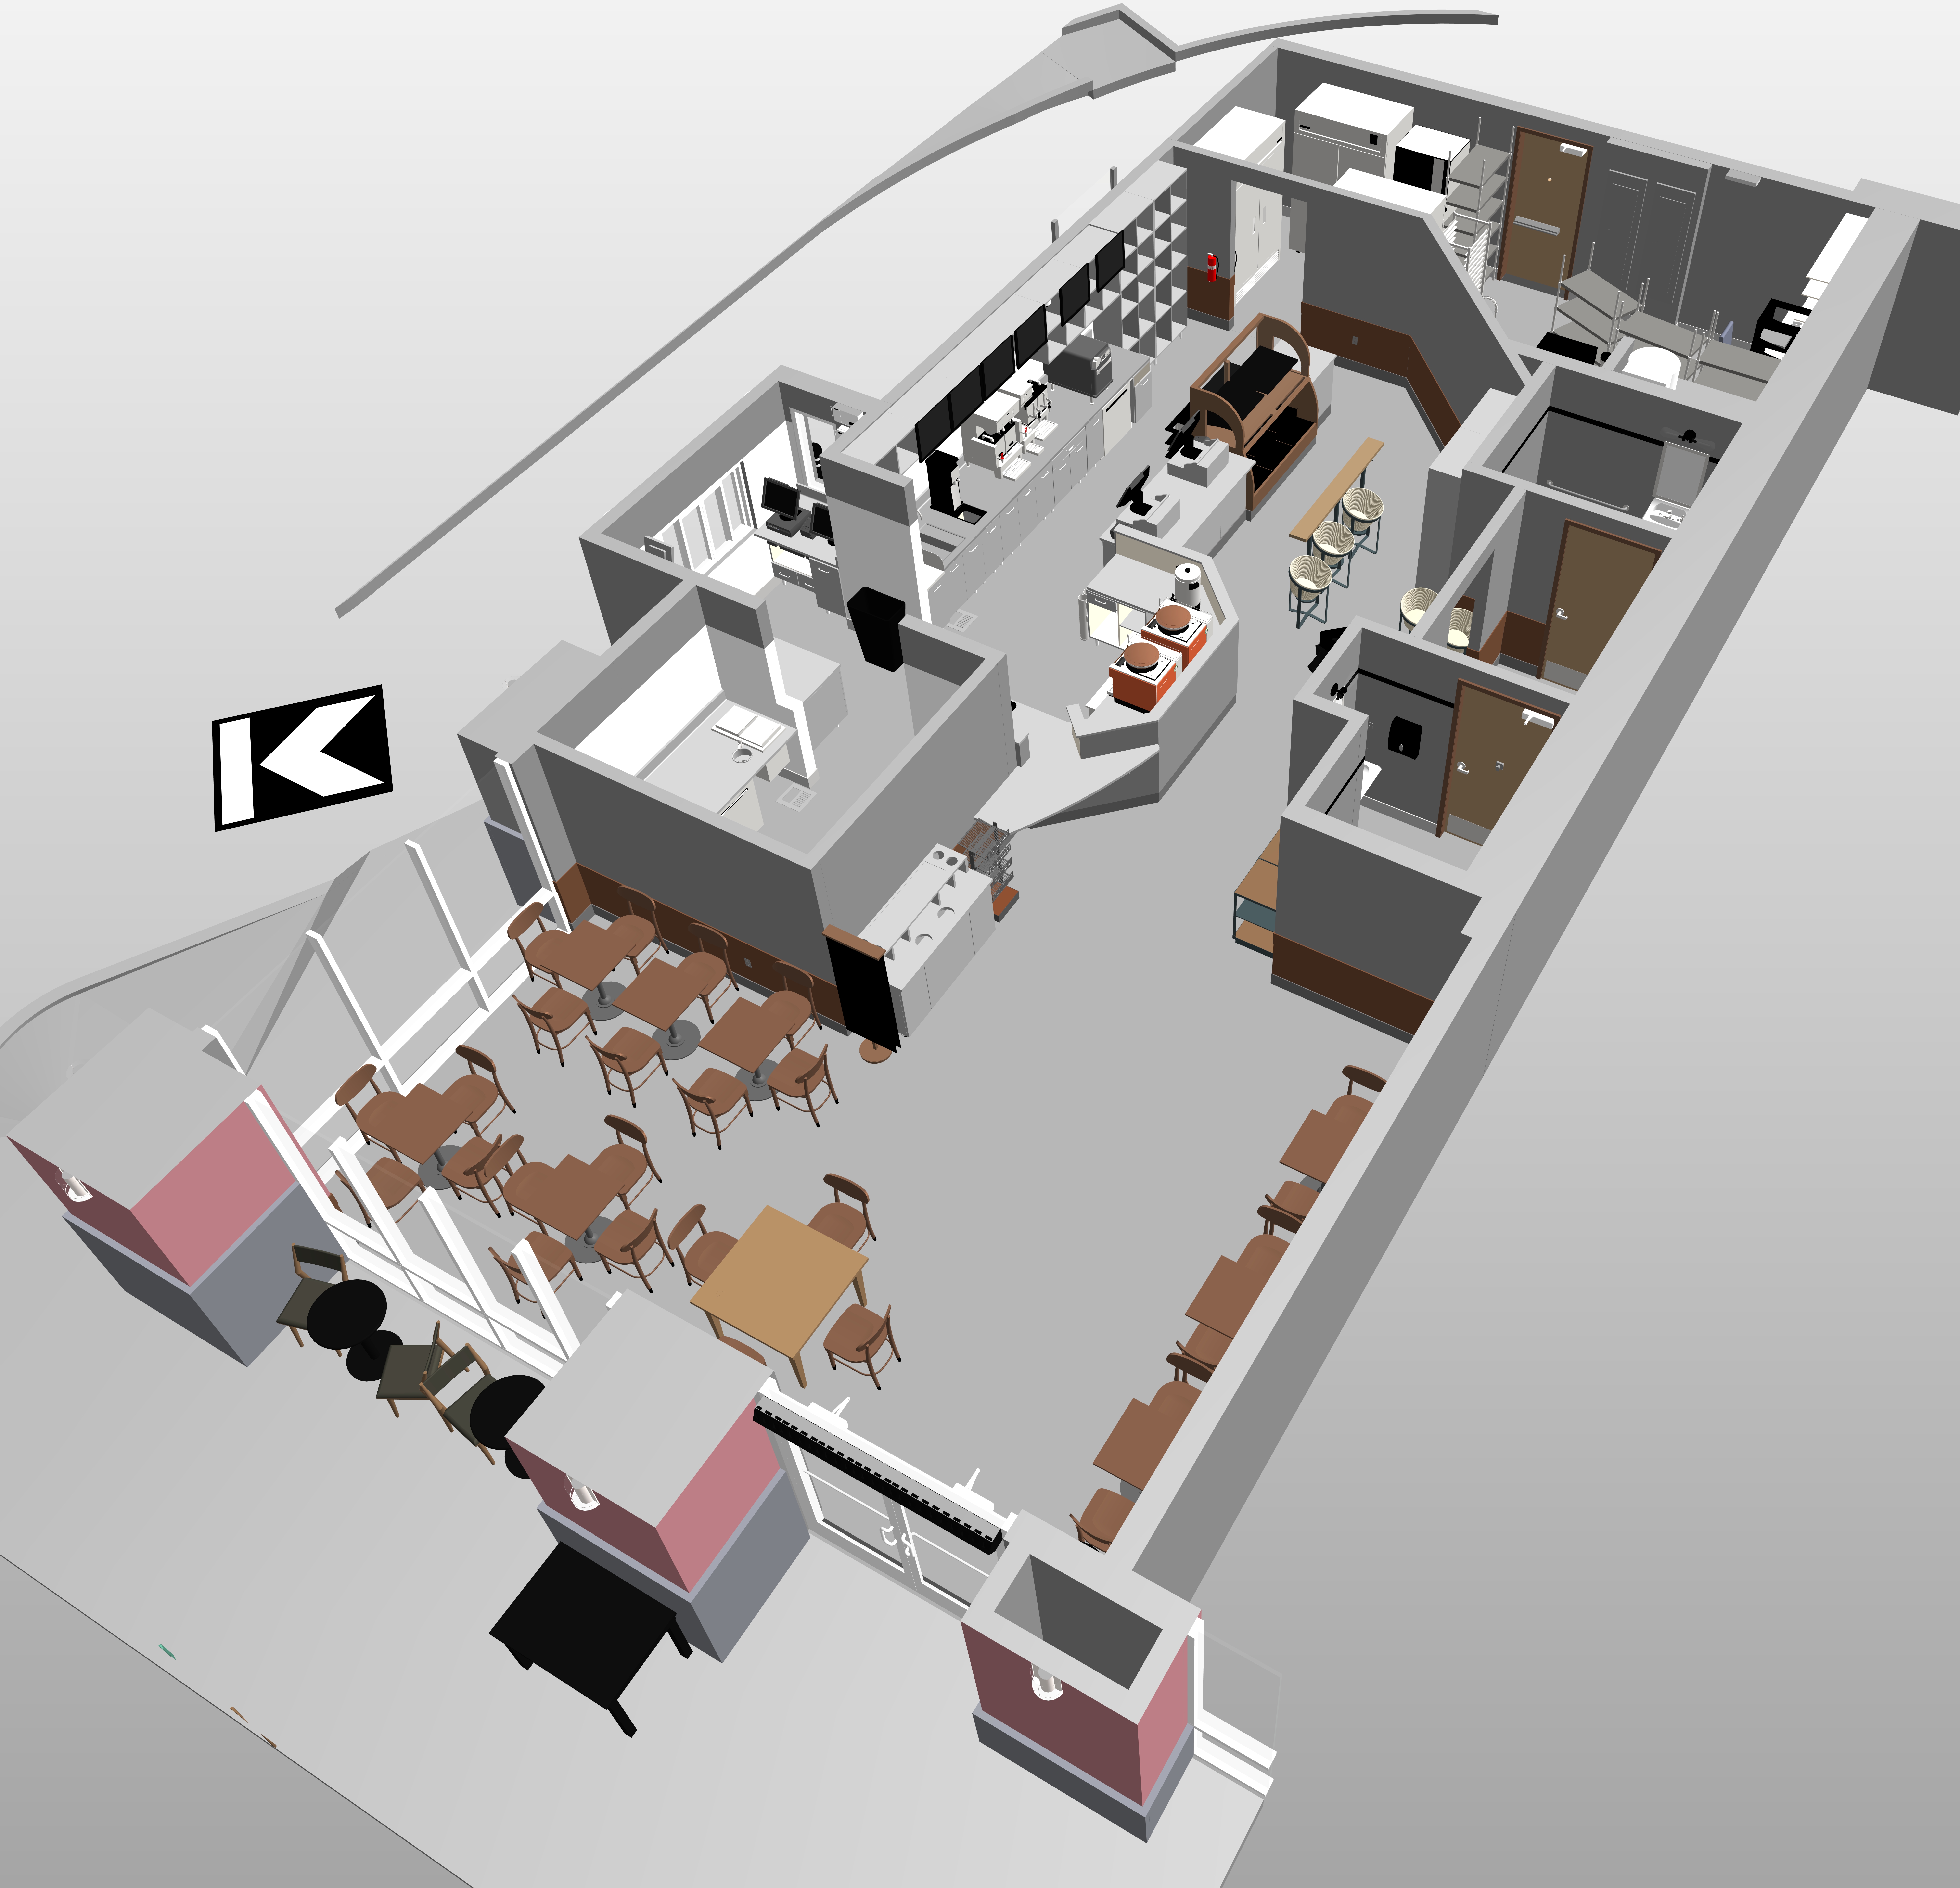
Point Cloud Scan Image
Stage 3: Quality Assurance and Validation
Now, you focus on model accuracy and level of detail. Ensure model components accurately represent the point cloud data. Implement quality assurance measures and validate the BIM model against the original point cloud data to ensure consistency and reliability.
Model Accuracy and Level of Detail
The Revit model needs to adhere to the defined project scope, ensuring the required level of accuracy and detail for each element and component. Following clear guidelines on detail and accuracy allows desired precision within the final Revit model.
Quality Assurance and Validation
The project scope clearly outlines the quality assurance and validation parameters for the Revit model. Regular checks and reviews during the conversion process help identify errors or discrepancies and ensure that the model aligns with the original point cloud data and project requirements.
Adherence to quality checks for technical needs requires the following:
· Make a check list of the modeling element category wise and as per the requirement of client to check the model. It may vary for every project based on the requirement
· Perform QA/QC using Section, Place section in various distances for checking the model
· Use a filter with colors and differentiate categories for checking the 3D BIM model
· Employing a view template
· Utilize the Navisworks walkthrough tool for the final check run of your 3D BIM model
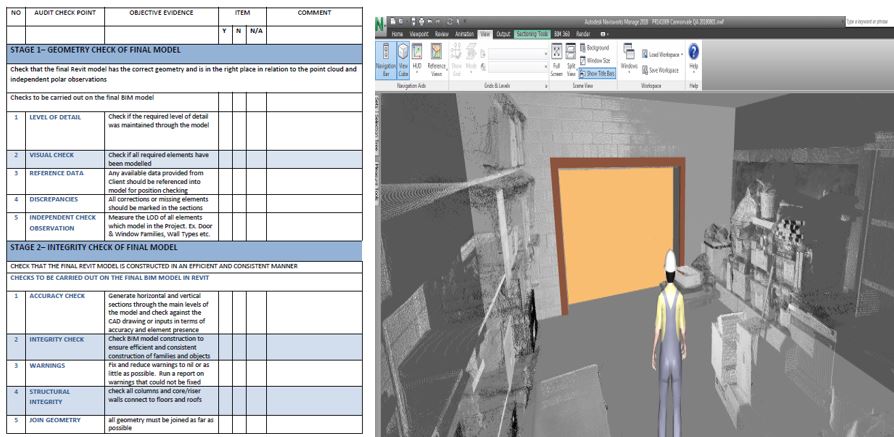
QA/QC checklist and Navisworks view
Conclusion
The adoption of a stage-wise approach to build Point Cloud to BIM models is critical for accurate and efficient renovation, retrofitting, and facilities management. Breaking down complex modeling processes into simple stages ensures seamless data acquisition, accurate modeling, and faster integration of Point Cloud data within 3D models.
A stage-wise approach fuels faster decision-making, reduces errors, and improves the overall quality of the BIM model. Embracing a step-by-step approach empowers teams and clients to harness the potential of Point Cloud to BIM leading to projects delivered within time and budget, enriched by excellence and precision.
About Author
Vishal Rajput is a Senior Manager in the BIM division at HitechDigital bringing over 20+ years of diverse experience in managing Architectural & Structural CAD and BIM projects. He is a certified professional in Autodesk Revit and NEN 2580 and oversees a highly skilled BIM team at HitechDigital, focusing on infrastructure, commercial, housing, retail and other projects. Throughout his tenure, he has successfully delivered 100+ projects for clients around the world. In addition to his project management responsibilities, Vishal actively participates in techno-commercial discussions and engages in research and development activities. He frequently shares his extensive experience through blogs and articles, aiming to promote excellence in the AEC industry.