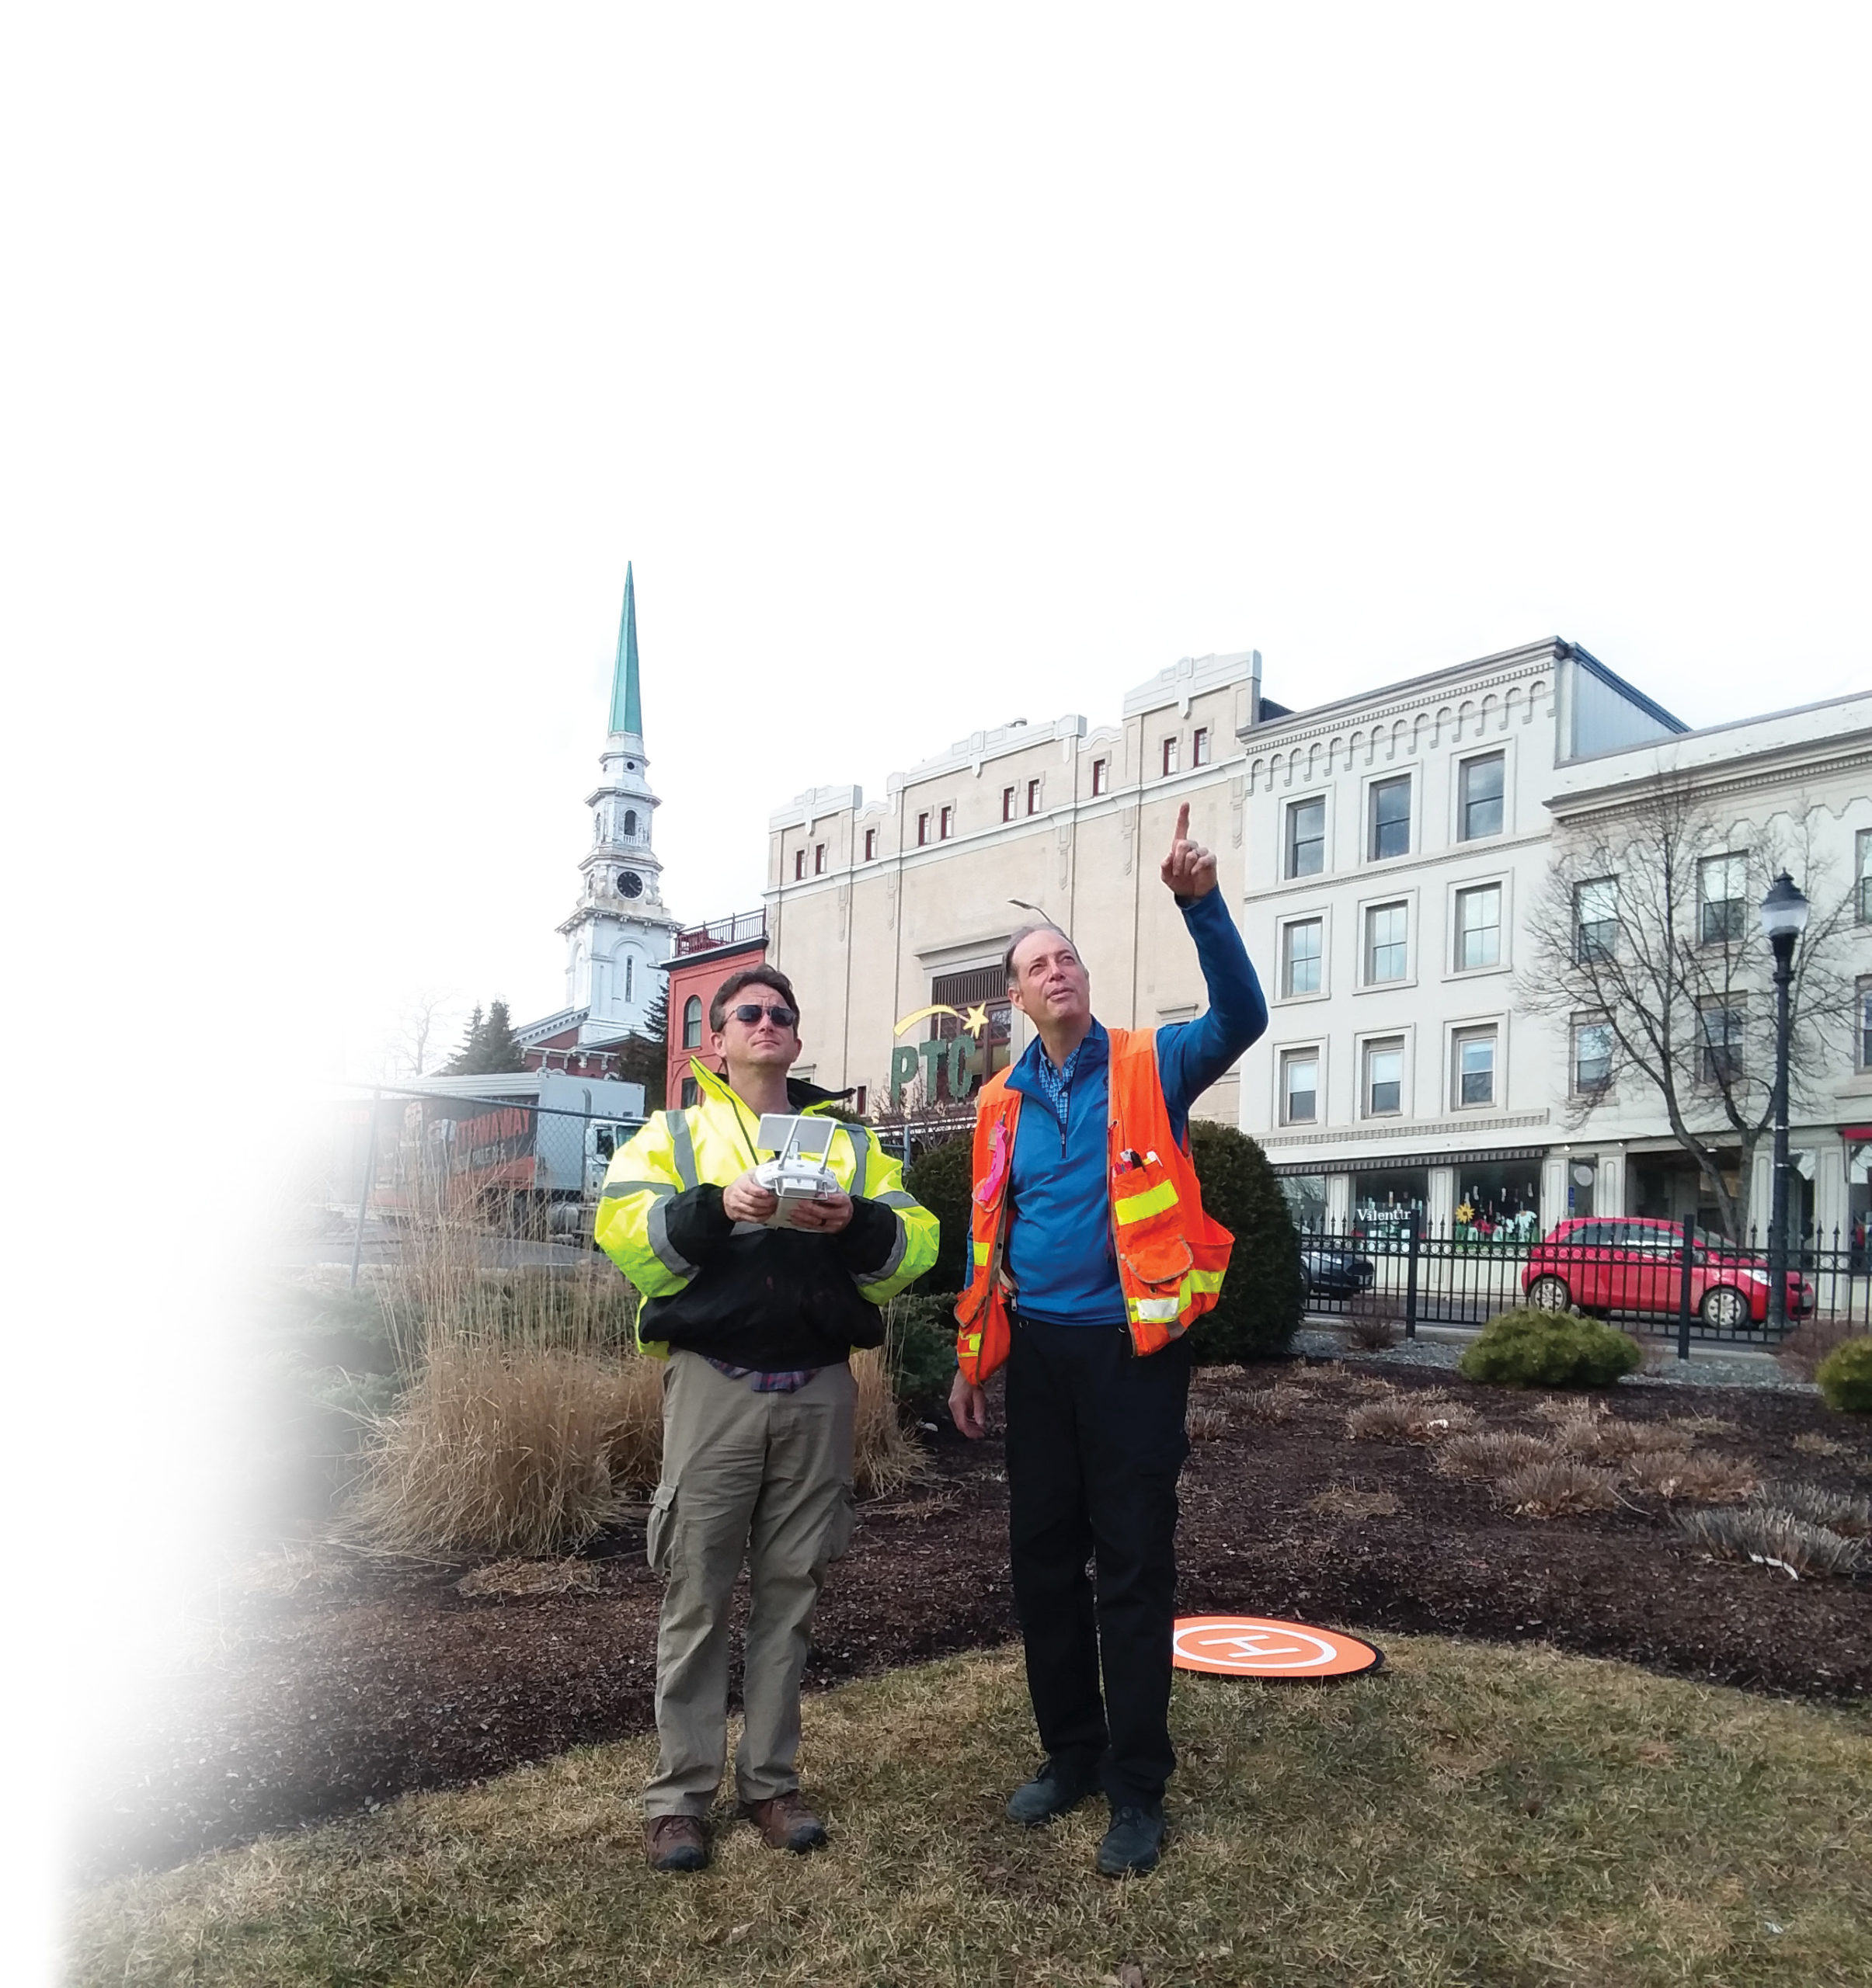
Plisga & Day Drone Team: Keith Blanchard (left), Remote Pilot in Command; and Jon Stewart, Visual Observer.
In November 2019 my company, Plisga & Day Land Surveyors in Bangor, Maine, was suddenly faced with three big projects that were open sites with urgent deadlines.
These were what I call “ground pound” projects—road surveys, topo surveys, site surveys—places where you have to get a lot of data and you have to do it accurately and fairly quickly. But winter was approaching, and in Maine that means snow. Often lots of it with huge snow banks that hide the edges of roads, driveways, and lots more.
In the past for larger projects—20 acres or more—we would have hired a consultant to do our photogrammetry flights and map projects for us. They’d go out there fairly quickly, but we wouldn’t get the results for several months or so. We needed it all done sooner.
Earlier in the fall of 2019, I had been to a Carlson Software seminar hosted by Maine Technical Source and learned more about Carlson Point Cloud and how it worked with Carlson Survey. And near the end they mentioned their new photogrammetry software Carlson PhotoCapture.
Since that seminar, 3D mapping, laser scanners, drones, and point clouds had been on my mind. So, when the pressure of projects getting done before snowfall bore down on us, I had—I’ll call it my “eureka” moment—and said, “Let’s fly it with a drone!”
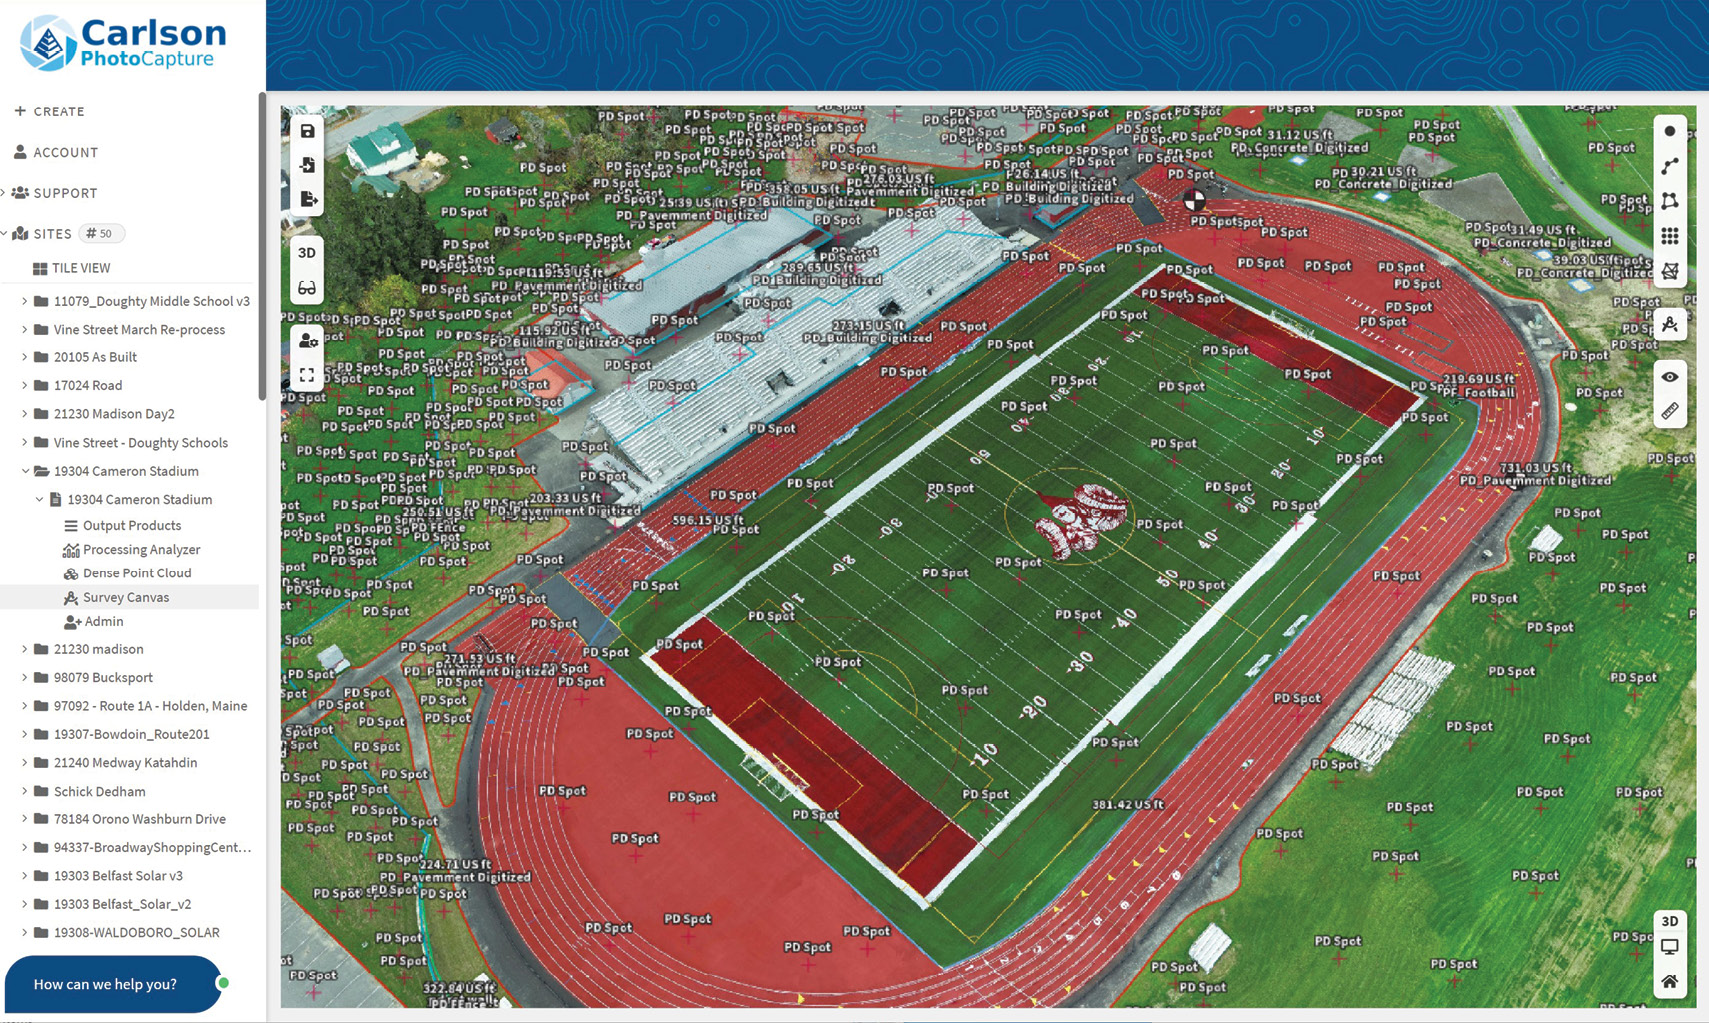
Carlson PhotoCapture Survey Canvas with spot elevations picked on athletic fields.
These project requests definitely lent themselves to photogrammetry techniques in that they were large and mostly open to the sky (meaning not a lot of trees). They included a road/sewer project further north in Maine that needed six road sections mapped—close to a total of four miles of road, a nursing home on 10 acres, and a 50-acre initial mapping for the Bangor School Department that included two schools, five athletic fields, tennis courts, a track, and assorted parking. But all three would be harder if not impossible to do once the snow arrived. Plus, in these times, our work slate was full and how do you expand your services if you can’t find qualified people. So, we decided to go with technology.
I had never really dabbled in photogrammetry other than setting targets for other people to do the mapping, but I was in touch with a fellow graduate of the University of Maine Surveying Engineering program, Langley Willauer, who had an early model DJI Phantom 4 drone with a 12-megapixel camera. He was very interested and willing to assist me in getting the work done. Now we had a drone and, more importantly, a registered UAV pilot to fly the sites.
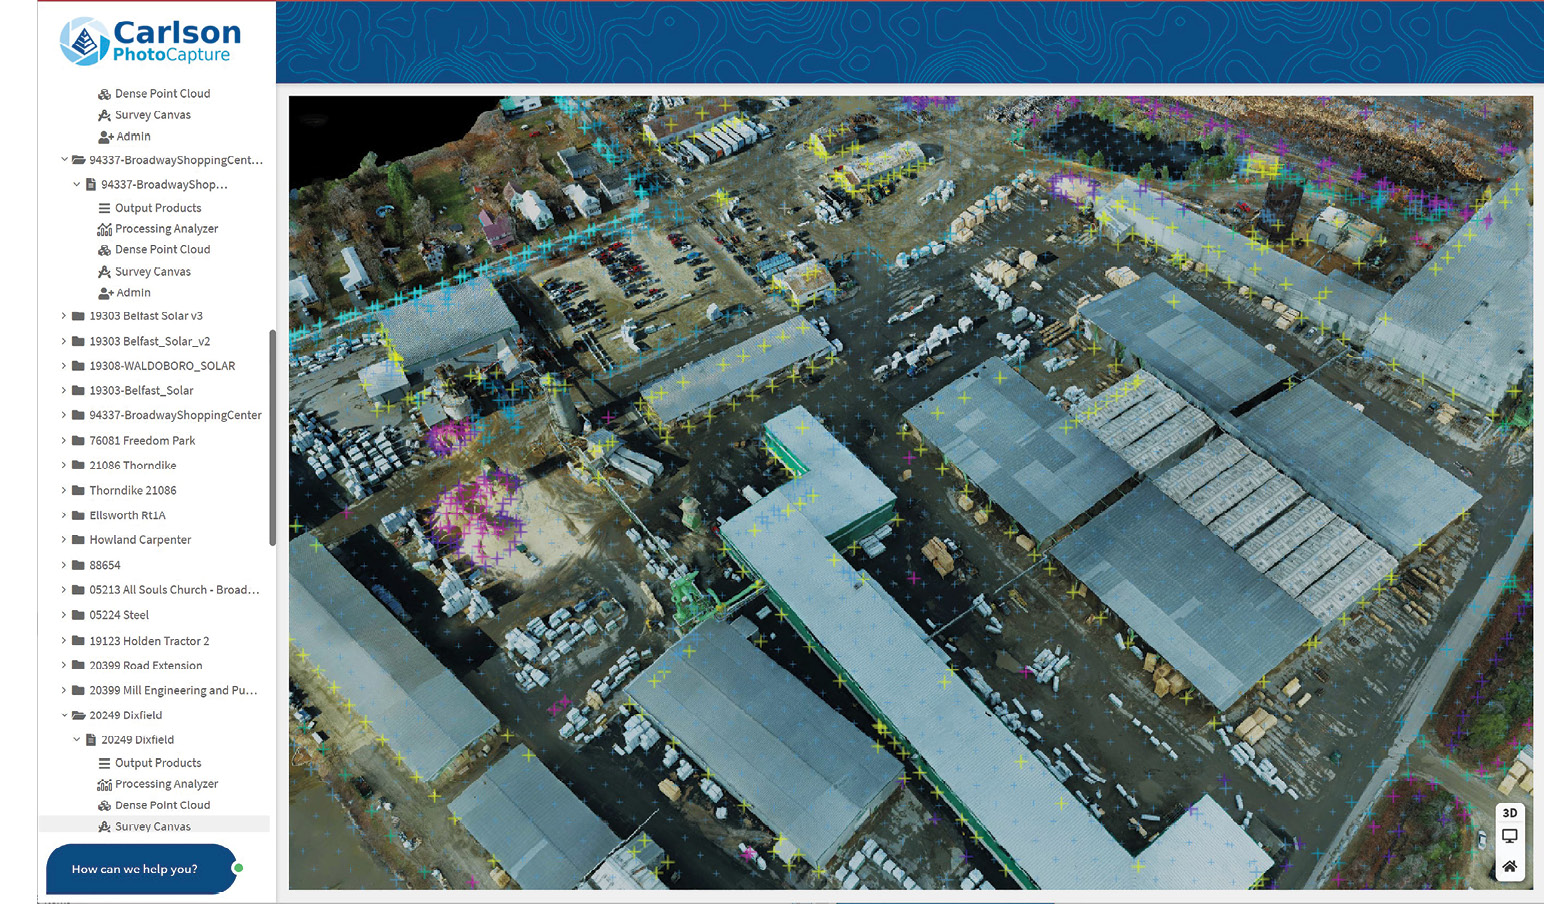
Digitized elevation breaklines for a lumber mill site.
Having 15 licenses of Carlson Survey and recalling that PhotoCapture demonstration earlier that fall, it was natural to turn to Carlson for our photogrammetry software. We started with just a trial version of PhotoCapture after talking with Carlson people, including Steve Cummings, Carlson’s PhotoCapture Product Manager, who said, “Yeah, that’s what this product is made to do.” So, we crossed our fingers and went with it.
Speed and Richer Data
We knew that for a flight to work, meaning for this methodology to translate into good mapping, we needed to do some work to include real world points to control the model. In our case, this meant setting out ground targets or targeting on existing features such as paint strips. In surveyor mode, this part is very easy. Just paint 5 to 20 4- by 18-inch X-shaped crosses on the ground and locate them with survey GPS or whatever is used to get geo-referenced control.
In the span of two weeks, we targeted and then flew all three sites. Each flight took less than a half-hour. Additional field work included capturing the ground control points and many check points. As a surveyor, “measure twice” is more than a saying.
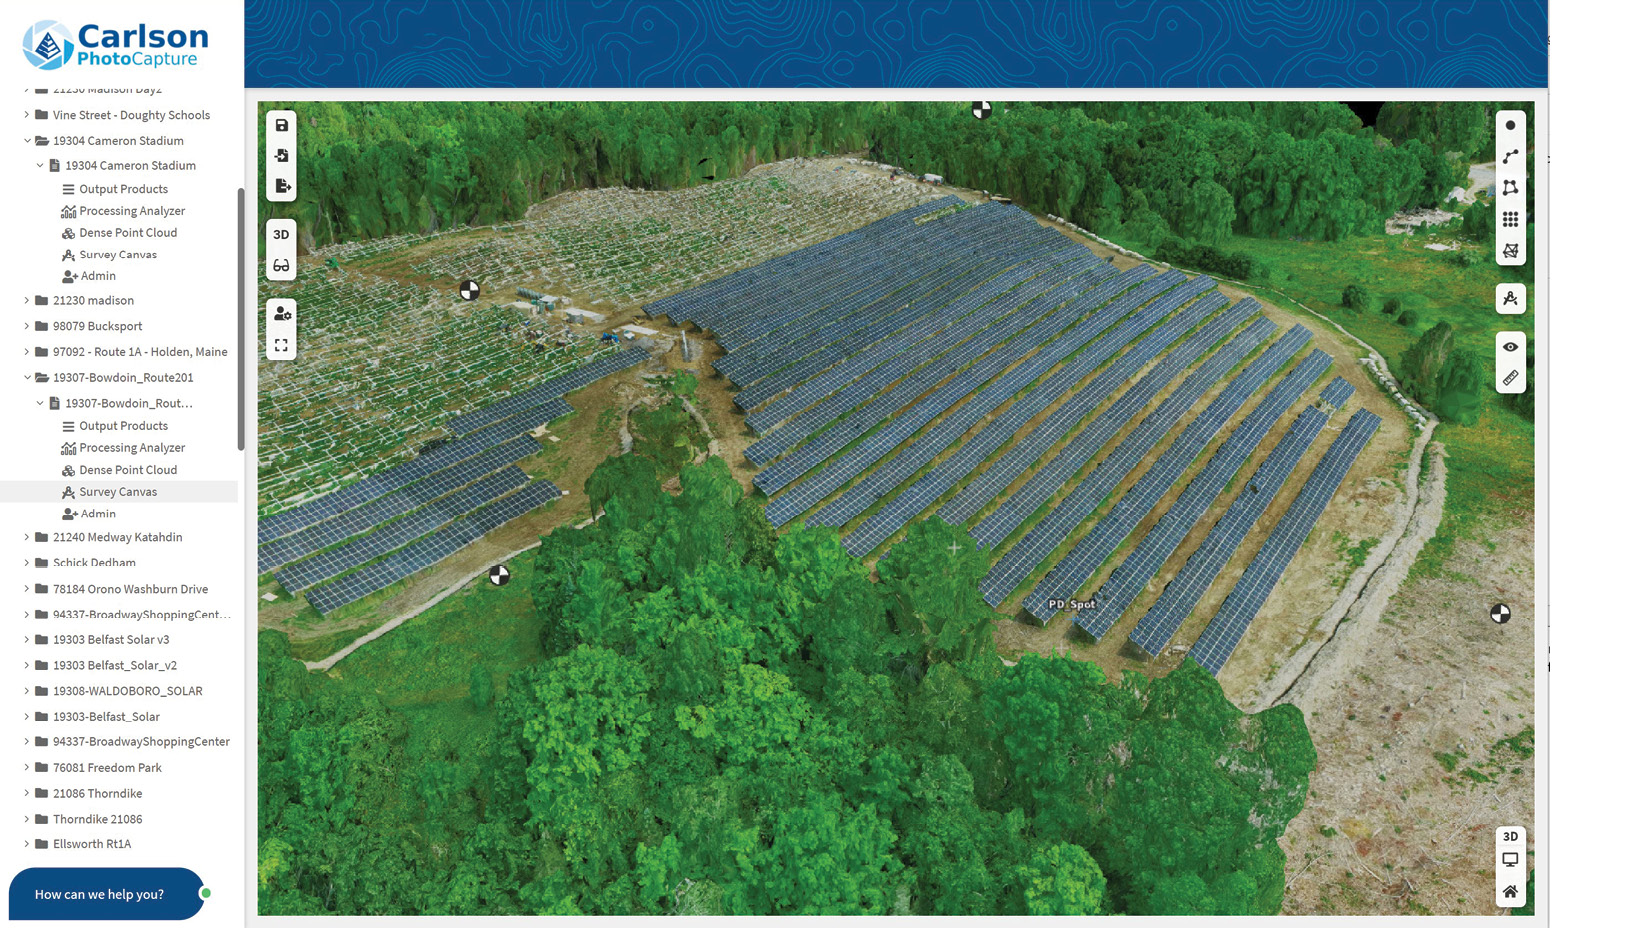
Carlson PhotoCapture perspective view of partially completed solar farm. The black and white targets are the ground control points.
However, with hundreds of photos in hand, we had to extract the mapping data that our client requested. We uploaded the overlapping photos with the ground control to the PhotoCapture cloud. Carlson’s photogrammetric wizardry of turning photos into a 3D tangible model occurred in the cloud where the aero-triangulation and bundle adjustments processed massive amounts of common pixels to create a 3D representation of our flights.
Of course, once we got the photos we had to learn how to process the data using PhotoCapture Survey Canvas. That’s when I had my training with Steve Cummings of Carlson. Survey Canvas extracts the data you need. For example, I used Survey Canvas to quickly create 3D objects such as points, polyline, or grid meshes that were exported to a CAD environment for final drafting. The software is relatively straight forward so it didn’t take long to be up and running. Carlson does the hard part, the math—we just had to keep doing what we were doing, measure and work and make sure things lined up, and try to make the real world squeeze onto a flat computer screen.

A view of a small shopping mall parking lot assessment with ground control points visible.
The processed results and deliverables such as the orthophoto, DEM, and LAS file were available in several hours. In summary, the model is built from the photos in a matter of hours. Once we had the 3D model it was time to extract the specific data needed such as breaklines, sewer manholes, utility poles, edges of pavement and other “TOPO” features.
Added bonus
It all worked. We had our needed CAD data from the 3D model. And, sure enough, about a week after we flew them, we got a foot of snow.
How well did we measure? We got really good results out of the process. Our typical Ground Sample Distance (GSD) was around 0.02 feet. For what we were trying to accomplish, it was more than good enough at the time. We delivered each of the three projects on time with the added bonus of having an up-to-date background image for the clients.
One other benefit was realized a little later. Soon after we delivered the street project for sewer work, the engineer called and needed seven manholes. By then there was two feet of snow on the ground, and I grimaced at the thought of digging those out to locate them. I soon smiled, however, as I thought they might already be in one of the PhotoCapture models. Sure enough, I logged in and using Survey Canvas clicked on six of the “missing” manholes and got the x, y, z location for the engineer. There was still one outside our mapped area that had to be dug out, but better an hour of work than a full day.
Increased work and efficiency

Plisga & Day’s Jon Stewart (left) holding a Phantom 4 RTK drone with Keith Blanchard, Remote Pilot in Command. Both are drone proponents and, on occasion, drone evangelists.
As winter turned into spring of 2020, we started getting requests for more mapping data sets. My colleague, Keith Blanchard, was pursuing his FAA UAS Part 107 pilot license so I challenged him that if he got his license I would be forced to get him a drone to do all this work. He did so we purchased a DJI Phantom 4 with RTK and a 20-megapixel camera. Now we could take our own pictures with our own in-house pilot Keith Blanchard. It’s just a more efficient way to work instead of ground pounding. And the flights had the added strength of a GPS base station sending corrections to the drone. This brought our average positional errors down to below a tenth of a foot. Now we were surveying!
Looking back, I have to say, “Wow!” We’re offering a service that’s much more robust than we did before. It may be overquoted, but we’re finding that a picture is definitely worth 1000 words (and usually more than a 1000 dollars). Especially with real time precision added to the drone and a better camera, with which Keith notes we’re getting quality measurements.
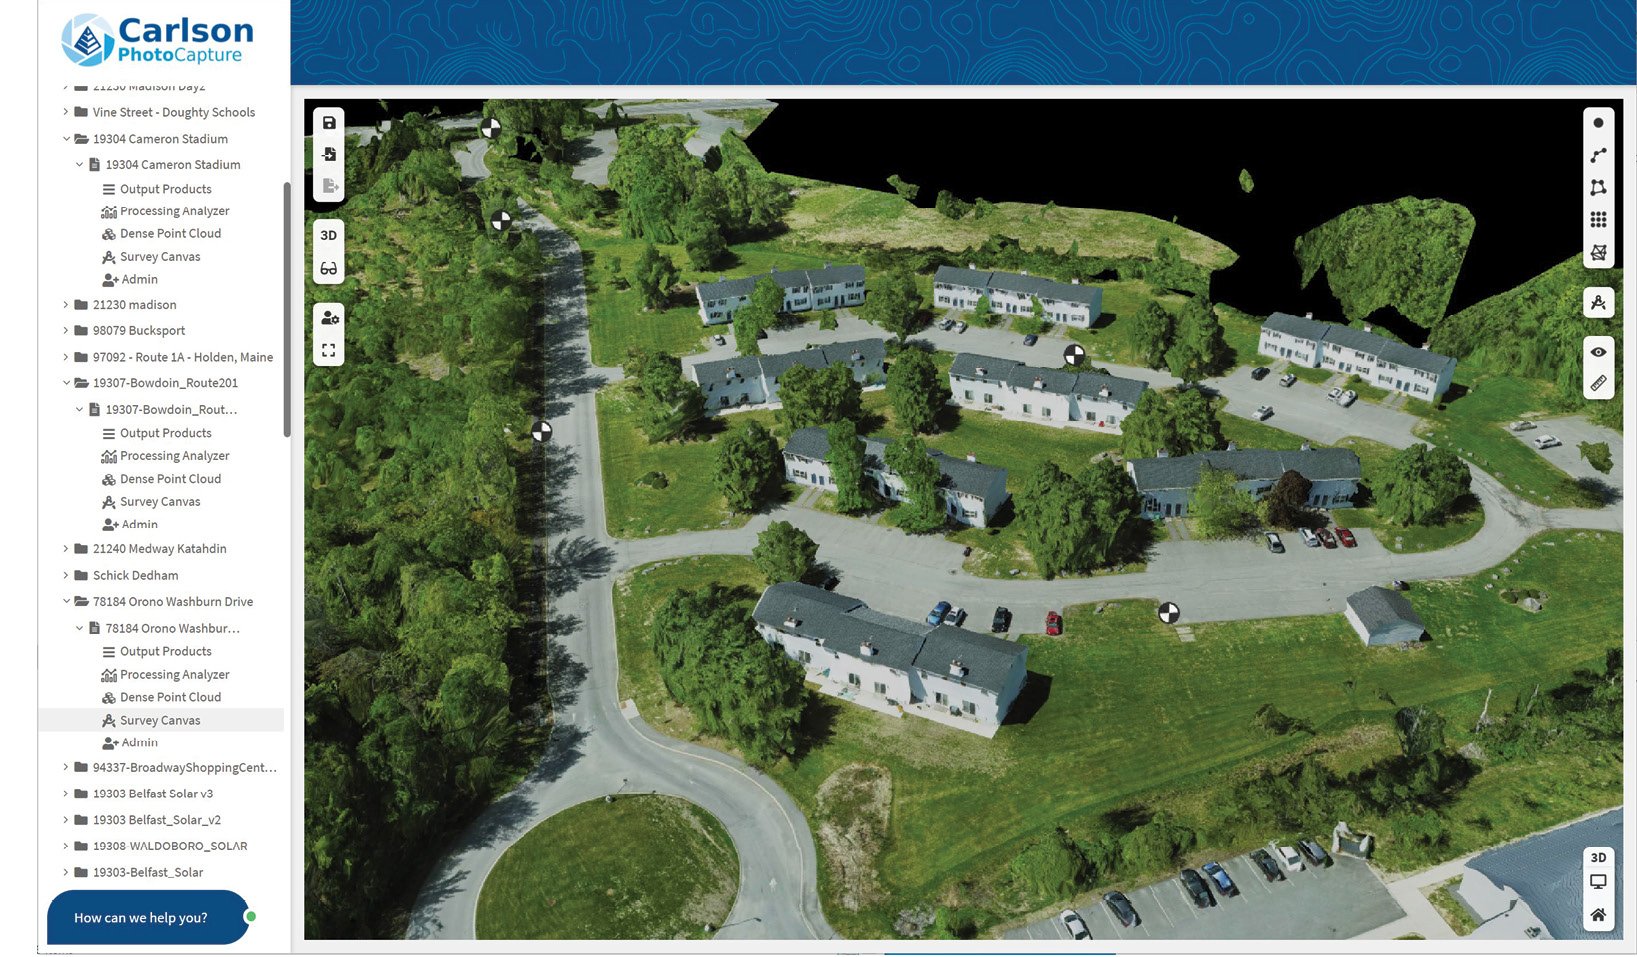
In Carlson PhotoCapture, an apartment as-built. Notice black and white targets for ground control.
Engineers and designers just love seeing the ortho photo and all the background in the TOPO we give them. They can see if landscaping is in the way or if there is a sign or a mailbox across the street. They can see so much more in the photo it allows them to make some decisions that maybe they wouldn’t have known about and adjust their design accordingly.
We’re using the drone and photogrammetry for a lot of solar projects now. There might be an existing 100-acre farm, which all of a sudden isn’t being used for agriculture and the land owner is being talked to by a solar company, saying, “Hey, let’s take 20 acres of your field and put solar panels in there.”
It used to take three or four days to do the survey, but the drone with PhotoCapture is a great way to map what’s there on the ground without there being a lot of ground time. So other than control points, utility location, and some boundary checks, we get some surprisingly good results of where the ground is in the field.
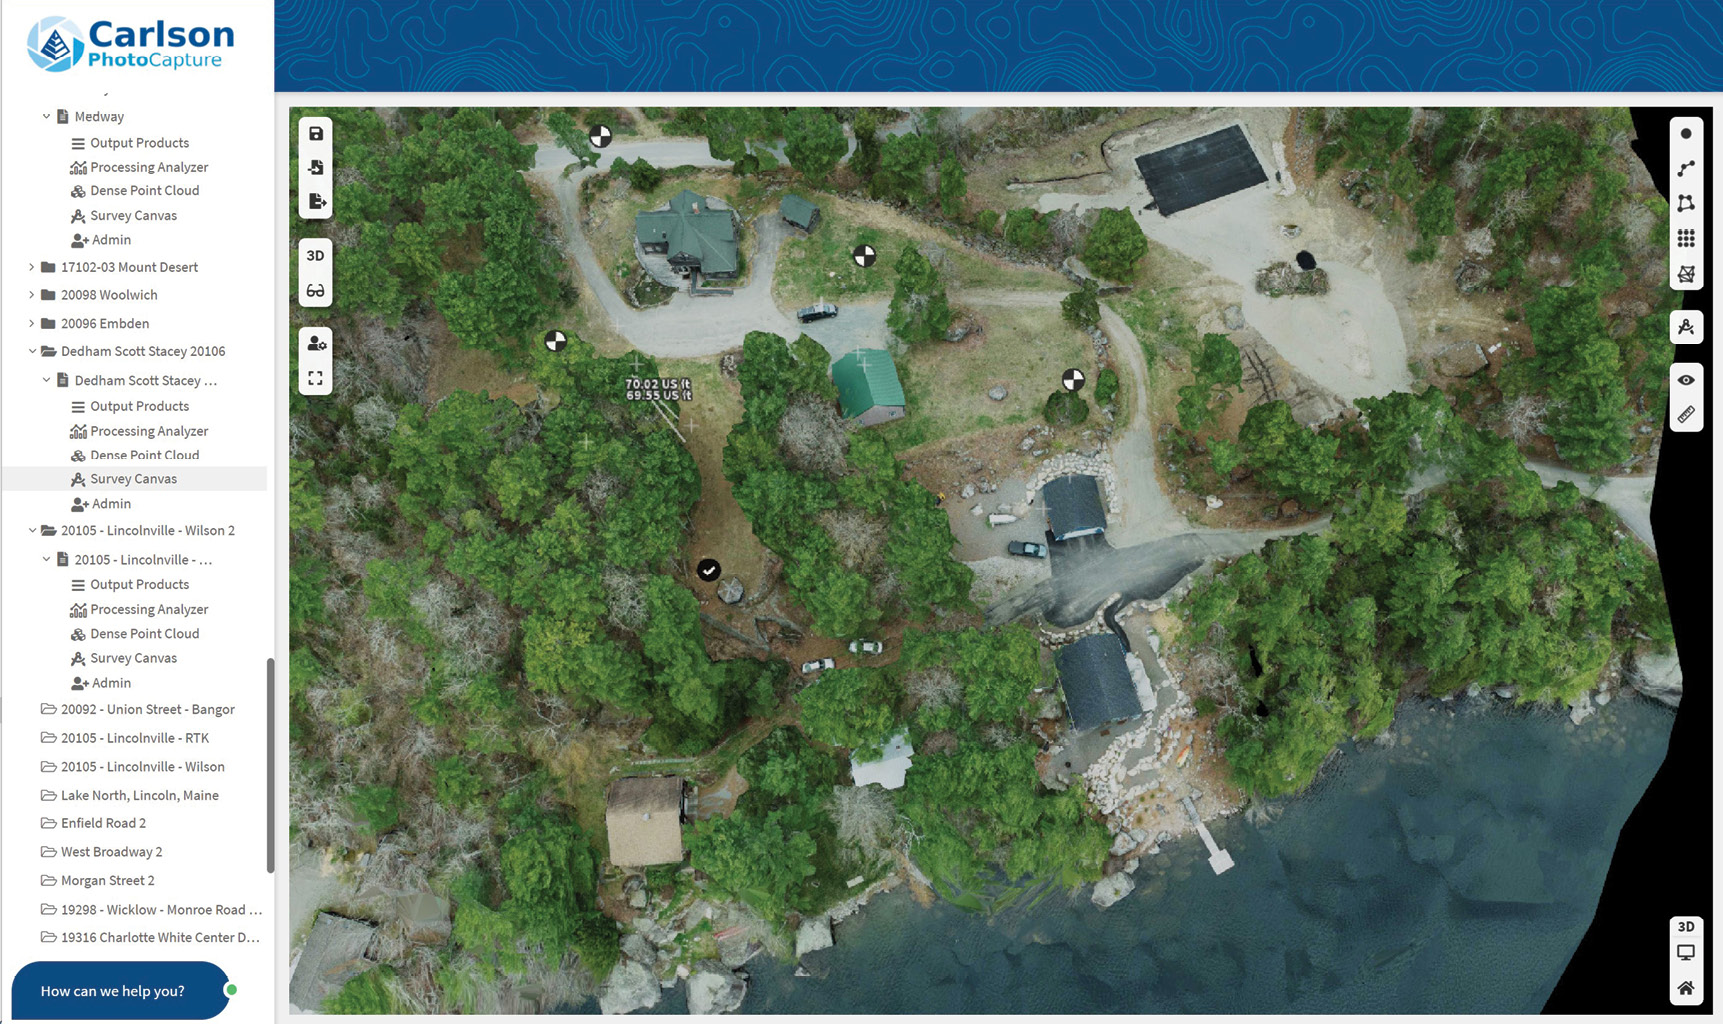
A site flown to map tree heights around a lakefront cottage.
Typically, these are mowed fields or cleared areas without much tall vegetation and no significant tree canopy. However, an added benefit is that, because it’s photogrammetry, we can model the tree canopy. Then the engineers can see how much shading there is from the trees and determine what’s going to be most efficient for the solar arrays. Please note: The photos are limited to what the camera sees, and they don’t “see” the ground like other technologies such as LiDAR. Fortunately, the entire state of Maine has been flown over the last 10 years with LiDAR and this data can be used to check or even fill in those trouble areas of vegetation.
We’ve done landfills, where we capture information at a certain time and then go back in and show them what’s been added or how a site might have settled. We have also used this process to see what volume of material has been removed in the case of gravel pits.
Plus, the flights and remote processing is more affordable for our clients. Instead of taking two to three days to survey a 10-acre gravel pit, we can do it in a couple of hours. It’s a huge time savings for us on some of these large open sites.
Our largest project was more than 300 acres—that took two flights to do that one. For our purposes, the only limiting factor is how much data we are pushing up into the cloud with PhotoCapture. Once we start getting above 10 gigabytes, it really takes time. The cloud absorbs it, then two, three hours, or overnight, we get data. It just magically appears on the PhotoCapture website and we’re able to download our quality report, DEM, LAS file, and orthophoto and start working in Survey Canvas.
Safety First
One of the biggest benefits of using the drone and photogrammetry is the safety factor, especially when doing busy roads. Instead of having to set up traffic signs and cones and shut off a lane of traffic, you don’t have to have workers out in the roadway dodging cars and trucks. While you can’t fly over the road, you can fly adjacent to it.
Keith and I manage our own projects but also work with our 11 other surveyors at Plisga & Day and our sister company known as Good Deeds and when anything is near a busy road I say, “Let’s fly it!”
Our most unique project was measuring a rocky shore line on the coast of Maine with 50-foot cliffs. It was a tidal area on the ocean and there were 12-foot tides. We decided that we couldn’t do it with traditional survey equipment. Keith and I agreed that unless we would have people repelling off the rocks, there was no way to measure it. We opted for the interesting combination of a laser scanner at low tide and a drone flight to confirm the results we were getting from the laser scanner. Turns out we used the drone data a little bit more than the laser scanner data because it was just easier to get into the nooks and crannies from the air—to be able to get a bird’s eye view.
Expanded work
We’ve pushed ourselves out to the mapping world a lot more. Last year we did about 30 projects from two-acre sites to 300 acres using the drone and photogrammetry. This year we’ve already flown five sites and lined up about five more.
There are still some things you have to measure and model on the ground. The drone and photogrammetry are just another tool in a surveyor’s arsenal. It allows us to very quickly turn around a 5-, 10-, 20-acre site that might take a week with traditional survey. On site plans with lots of detail, you get it all and can easily turn the picture into points, lines, or contours.
I’d say it’s our clients who are getting the big benefit. They’re getting real data for what they are trying to accomplish, even more information than they initially asked for.
We’re still learning all that we can do with the drone and the software, but it’s a 3D world now—the world is not flat and now you don’t have to model it that way. Keith and I have definitely become drone evangelists in Maine.
Jon Stewart is longtime resident of Bangor, Maine, and has been a Maine Professional Land Surveyor since 2001. He is actively involved in the Maine Society of Land Surveyors, and more locally as the Operations Manager and President of Plisga & Day with 14 other Professional Land Surveyors. All field operations credit goes to Jon’s business partner Keith Blanchard, PLS, who maintains and pilots the drone.
The Rise of Photogrammetry
The advantages of photogrammetry for a land surveyor are many…But how did we get here, and how does it work?
Photogrammetry is not a new word. In fact, the term was coined by a Prussian architect in 1867, but the introduction and advancement of affordable low altitude unmanned aerial vehicles (drones) equipped with high-resolution cameras on stabilized gimbals has recently opened a bevy of new possibilities for surveyors.
Today, with a Part 107 License from the FAA, a small, affordable drone, and some simple flight-planning software, almost anyone can gather all the information needed to create a photorealistic 3D representation of a site. For a surveyor, we can add ground control points (GCPs) and, optionally, an RTK-capable drone, and obtain high accuracy, geolocated orthoimages and point clouds, and thence all the contours, TINs, and other end-products that can be derived from them.
The key to survey-grade accuracy is the introduction of the aforementioned GCPs. Often created via an RTK GNSS receiver, these points are marked with a target that will be visible to the drone’s camera. The required number of GCPs will vary with the size and complexity of the site but can be reduced to only one or two if an RTK-equipped drone is used.
Before flying, a flight-planning software is used to select an area to be covered and determine the flight path, photo overlap, camera angle, drone height, etc. The pilot can then essentially hit the “Go” button and the drone will follow its commands before returning itself to its point of takeoff.
The resulting images and GCP information are then loaded into the photogrammetry software, such as Carlson’s PhotoCapture, where the processor-heavy but fully automated photogrammetry process occurs. A variety of output files are immediately available, most notably a dense point cloud and an orthoimage. These files can then be used, in conjunction with your favorite software, to perform “bare earth” commands, extract features, create contours and linework, and more.
In all, photogrammetry has become a versatile, time-saving option that has earned its spot next to laser measurement and GNSS technology in the modern surveyor’s toolkit.
—Ben Johnson, Carlson Software